First-time User Experience
After starting Lost Ark for the first time, you must select a region, select a world, and create your character. After creating a character, you can set the following Accessibility options:
Orientation of mouse click and keyboard layout. If playing with a Gamepad controller, the buttons can be remapped after starting the prologue with a controller connected.
Turn photosensitive animations on or off. If Photosensitivity mode is selected, animations with high areas of flashing light will be limited or reduced where possible.
Tip: You can access the Accessibility settings in-game at any time, after completing the first prologue cutscene.
Vision Accessibility Options
Color Blindness Filters
If you have certain types of color blindness, you can apply color filters to help distinguish in-game elements from the environment. Lost Ark provides color filters to support Protanopia, Deuteranopia and Tritanopia vision. The intensity of the filter is also adjustable.
Accessing the Color Blindness settings:
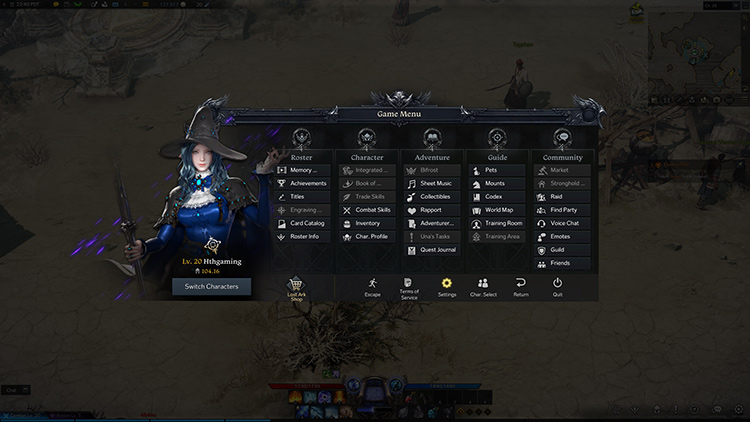
While in-game, press the ESC key on a keyboard (or RB+Menu button on a Gamepad controller) to bring up the Game Menu.
Select the Settings gear icon in the bottom center of the menu.
Select the Accessibility tab.
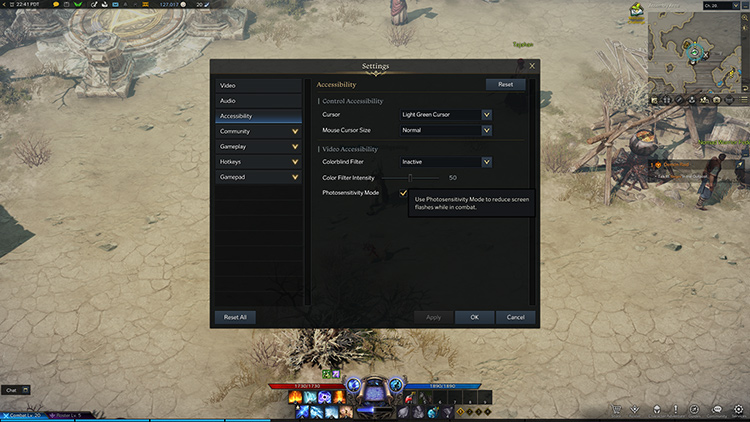
Under the Video Accessibility section, there are two options:
Colorblind Filter: Use the dropdown menu to select a filter: Inactive, Red – Protanopia, Red Green – Deuteranopia, Blue Green – Tritanopia.
Color Filter Intensity: Use the slider to change the intensity of the hues in the applied filter.
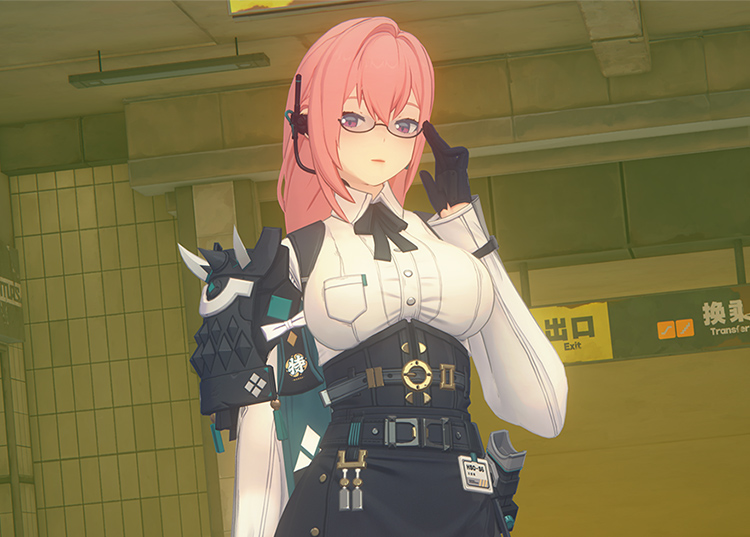
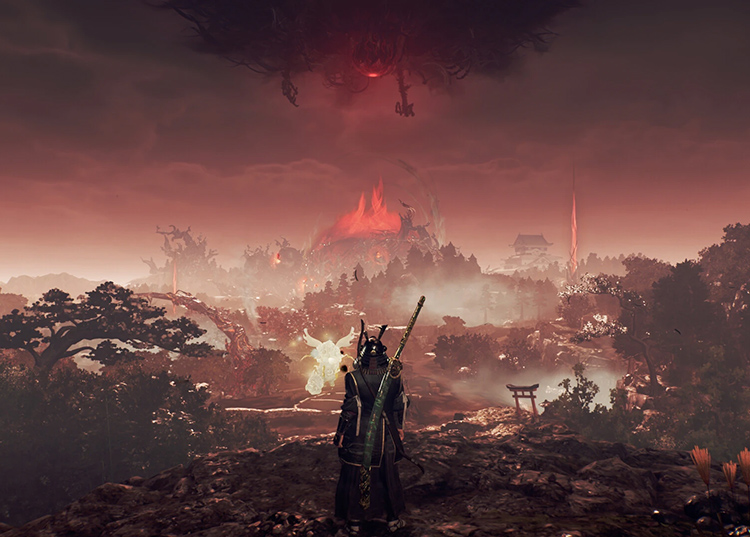
The following screenshots demonstrate the differences in each filter:


Photosensitivity Mode
If you’re sensitive to certain patterns and visual events, Photosensitivity Mode can help limit certain flashing animations in gameplay combat. You can turn Photosensitivity Mode on or off after starting your first character, or using Settings in-game.
Accessing the Photosensitivity settings:
While in-game, press the ESC key on a keyboard (or RB+Menu button on a Gamepad controller) to bring up the Game Menu.
Select the Settings gear icon in the bottom center of the menu.
Select the Accessibility tab.
Under the Video Accessibility section, select or deselect Photosensitivity Mode.
Select Apply or OK and the filter automatically applies to the game.
Tip: Some cutscenes will still have flashing animations. In those cases, subtitle text warning of the flashes and a Skip Cutscene button will be displayed.
Communication Settings
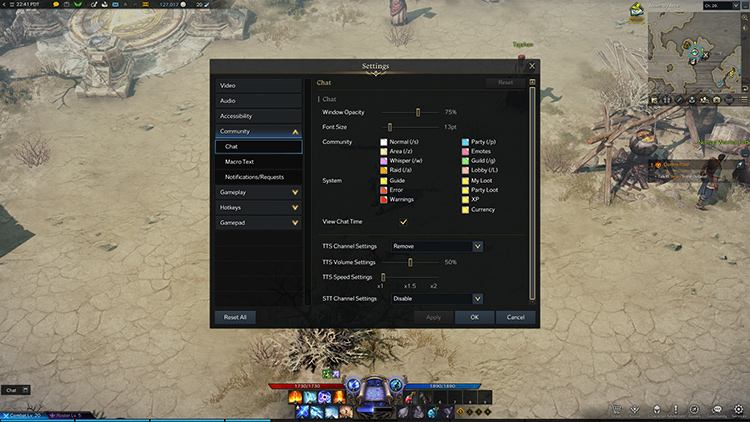
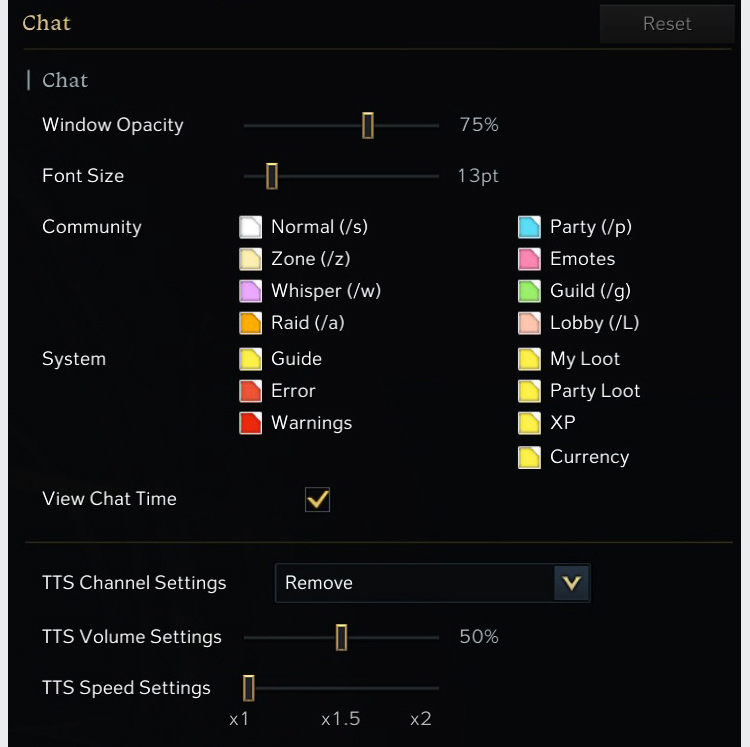
Chat Settings – Adjust your chat font size, chat window opacity, and the text color for 15 different system and community chat options. You must complete character creation to access these settings.
Note: Some chat types are only available after reaching certain levels in game, such as level 50 to join a raid.
Accessing the Chat settings:
While in-game, press the ESC key on a keyboard (or RB+Menu button on a Gamepad controller) to bring up the Game Menu.
Select the Settings gear icon in the bottom center of the menu.
Select the Community tab.
Select the Chat tab.
Visual Settings
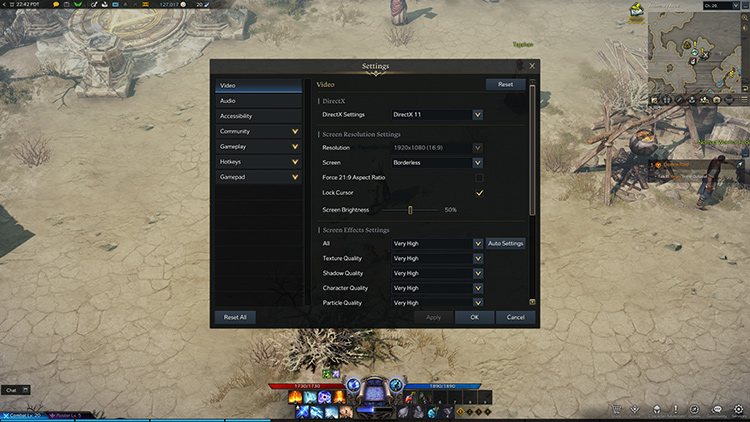
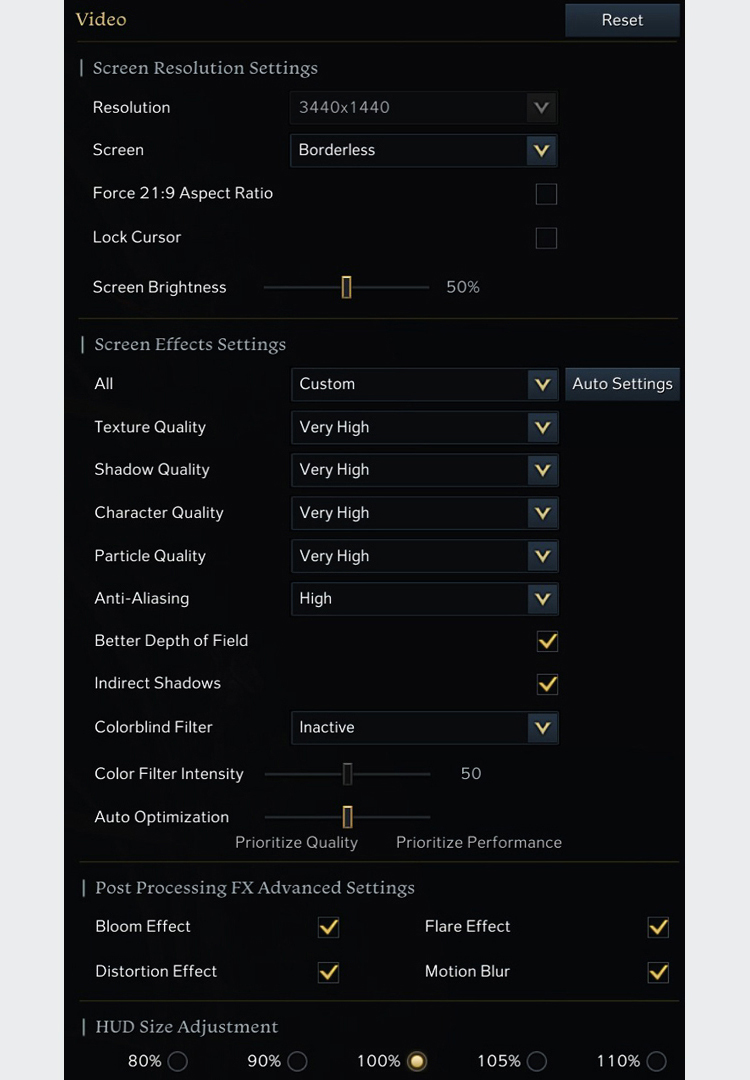
To access the Visual settings, go to the Video section of the in-game settings. You can adjust the following settings as needed for optimal gameplay visuals:
Adjust the HUD text from between 80% to 110% of the default size.
Disable screen shake effects during skill usage.
Resolution, Brightness, and FX Settings.
Quality of textures, shadows, characters, and particles.
Anti-aliasing, Indirect Shadows, Window Border, and Cursor Locking.
Accessing the Visual settings:
While in-game, press the ESC key on a keyboard (or RB+Menu button on a Gamepad controller) to bring up the Game Menu.
Select the Settings gear icon in the bottom center of the menu.
Select the Video tab.
Hearing Accessibility Options
Voice Language
Lost Ark’s default voice language is based on the language set in Steam when the game launches, if the language is English, French, German or Spanish. The voice language can be changed in-game after logging into a character.
Accessing the Voice Language settings:
While in-game, press the ESC key on a keyboard (or RB+Menu button on a Gamepad controller) to bring up the Game Menu.
Select the Settings gear icon in the bottom center of the menu.
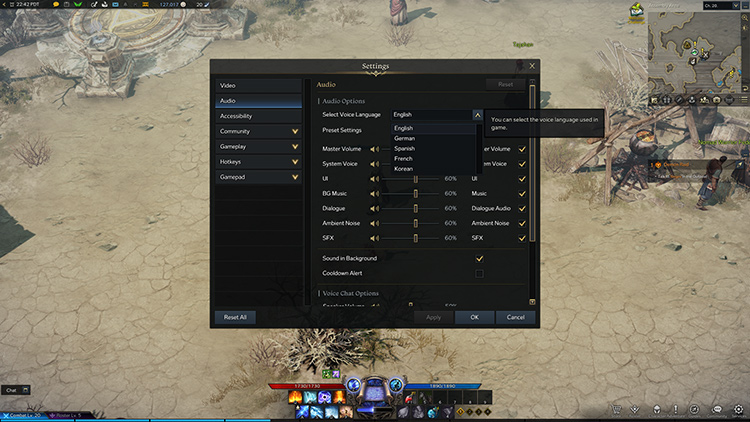
Select the Audio tab.
Using the Select Voice Language dropdown, select either English, French, German, Spanish or Korean. Note: You can use the original Korean voice with English, French, German, or Spanish text, but Korean text isn’t supported.
Audio Type Prioritization
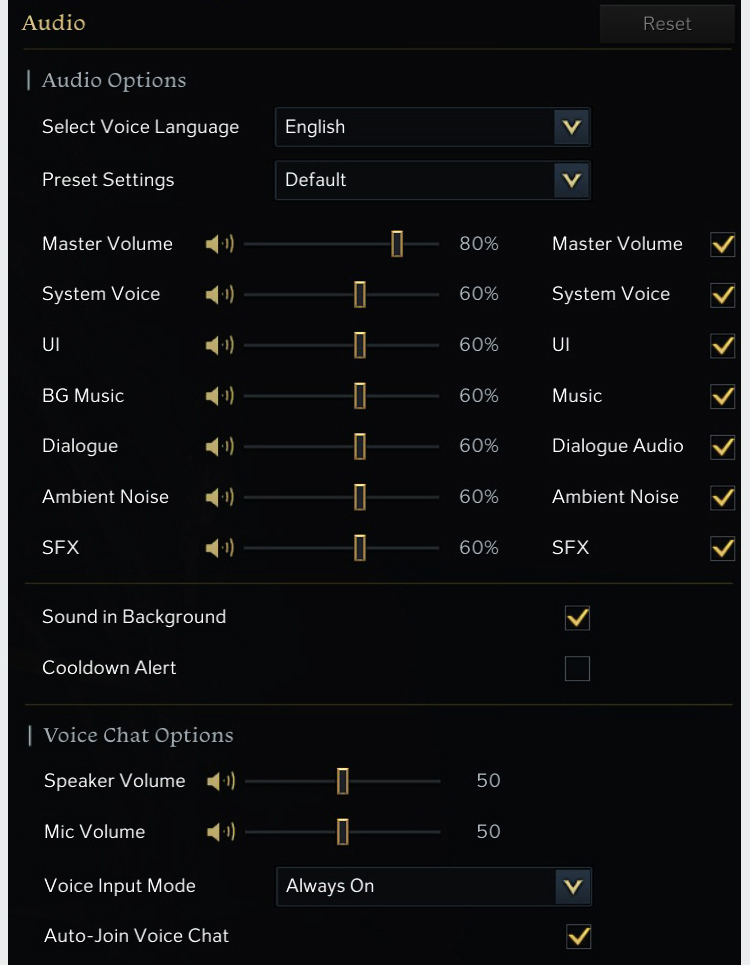
Use adjustable sliders to choose which audio type to prioritize relative to the other game elements. These audio types can be muted or adjusted:
- Master Volume
- System Voice
- UI
- Background (BG) Music
- Dialogue
- Ambient Noise
- SFX
Accessing the Audio Type Prioritization settings:
While in-game, press the ESC key on a keyboard (or RB+Menu button on a Gamepad controller) to bring up the Game Menu.
Select the Settings gear icon in the bottom center of the menu.
Select the Audio tab.
Select a preset to prioritize either Music, Ambient Noise, SFX, or Dialogue, or use the sliders to adjust or mute each audio type.
Voice Chat
Voice chat is available for group activities such as Guilds, Raids, PvP, and other events.
Accessing the Voice Chat settings:
While in-game, press the ESC key on a keyboard (or RB+Menu button on a Gamepad controller) to bring up the Game Menu.
Select the Settings gear icon in the bottom center of the menu.
Select the Audio tab.
Scroll down to review all Voice Chat customization options. You can:
- Change the Speaker Volume and Mic Volume.
- Switch the Voice Input Mode between Push to Talk or Always On.
- Turn on Auto-Join Voice Chat, which is turned off by default.
- Alter the Voice Chat HUD Opacity, which overlays the game activity.
Audio Settings
The Audio settings tab contains Voice Language selection, Audio Type Prioritization, and Voice Chat settings. It also includes individual adjustment slides and mute selection boxes for these audio types:
- Master Volume
- System Voice
- UI
- Background Music
- Dialogue, Ambient Noise
- SFX
Other options in the Audio tab include changing the Sound in Background and skill Cooldown Alert(s).
Speech-to-Text Settings
You can activate Lost Ark’s Speech-to-Text (STT) feature to transcribe voice chat into text.
Activating Speech-to-Text (STT):
While in-game and before joining any voice chats, press the ESC key on a keyboard (or RB+Menu button on a Gamepad controller) to bring up the Game Menu.
Select the Settings gear icon in the bottom center of the menu.
Select the Community tab.
Select the Chat tab.
Scroll down to the bottom to locate the STT Channel Settings dropdown and select Activate.
Apply the settings and close the menu.
When you join a raid, lobby, or party, you will have the option to choose voice chat. If STT is activated, the chat window in the bottom left of the game screen transcribes what is audible in voice chat. Transcriptions will appear in the tab related to the voice chat activity.
Note: Guild Voice Chat doesn’t currently support STT.
Mobility Accessibility Settings
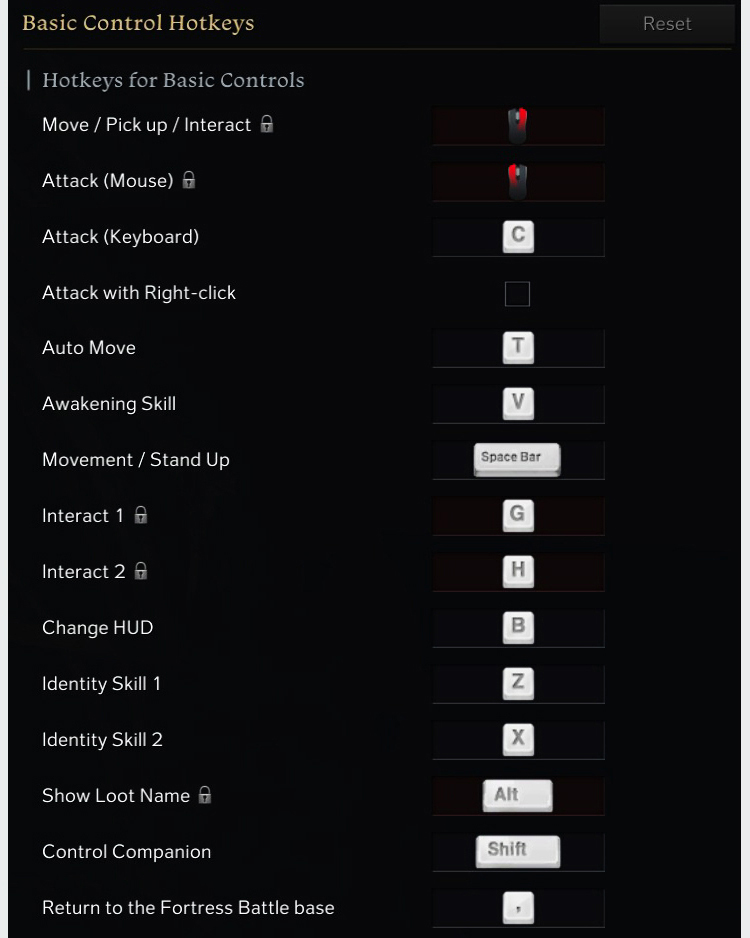
Keyboard Hotkeys
You can change the orientation of your mouse and keyboard after your initial character creation. Input modes and hotkeys can also be modified in-game after your character has passed the prologue cutscene.
Remapping keyboard and mouse hotkeys:
While in-game, press the ESC key on a keyboard (or RB+Menu button on a Gamepad controller) to bring up the Game Menu.
Select the Settings gear icon in the bottom center of the menu.
Select the Hotkeys tab.
Select individual lines and replace them with your preferred input button for most basic controls, sailing, skills, and item interactions. Note: Some hotkeys are currently locked due to game design limitations, including:
- Move
- Pick up
- Interact
- Attack
- Interact 1
- Interact 2
Controls and Display
You can use the Controls and Display menu to turn customization options for visibility of in-game enhancement, notifications, and UI elements on or off.
Accessing the Controls and Display settings:
While in-game, press the ESC key on a keyboard (or RB+Menu button on a Gamepad controller) to bring up the Game Menu.
Select the Settings gear icon in the bottom center of the menu.
Select the Gameplay tab.
Select the Controls and Display tab.
Scroll through the menus to customize settings to your satisfaction. Options include:
- Combat Settings: Auto Move, Cursor Aim, Skill Screen Shake, and Skip Dungeon Cutscenes.
- Quickslot Settings: Left-click, Right-click, and the Stronghold HUD.
- Keyboard Control Settings: Toggle Control Mouse with Keyboard to entirely replace your mouse input with a full keyboard, or customize the in-game cursor speed and acceleration sensitivity.
- Mouse & Gamepad Control Settings: Choose your Cursor Control Method or select the Snap-To Cursor Function.
Gamepad Options
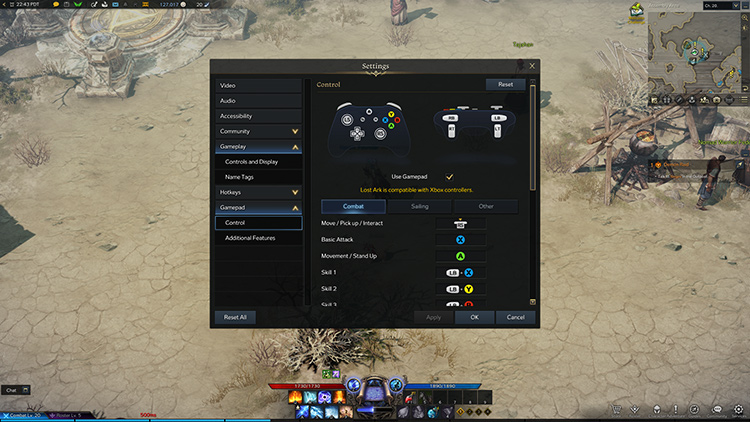
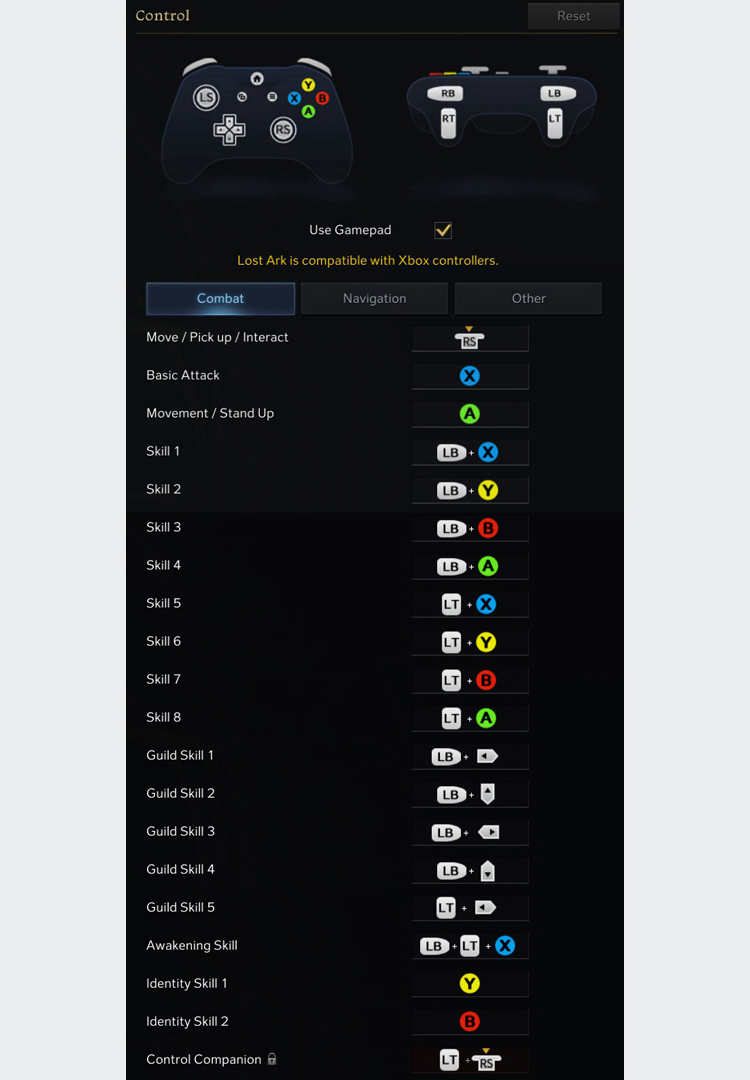
Lost Ark officially supports Gamepad controllers connected through Steam. Xbox controller visuals are used for in-game UI and tutorials. Alternate input controllers may be able to be used, but hotkeys may be locked to the officially supported input modes.
Remap controller hotkeys:
Connect a Gamepad controller to your PC and confirm that Steam recognizes it, before launching Lost Ark.
While in-game, press the RB+Menu button on your controller (or ESC on a keyboard) to bring up the Game Menu.
Select the Settings gear icon in the bottom center of the menu.
Select the Gamepad tab.
Select individual lines and replace them with your preferred input button. Some are currently locked due to game design limitations.
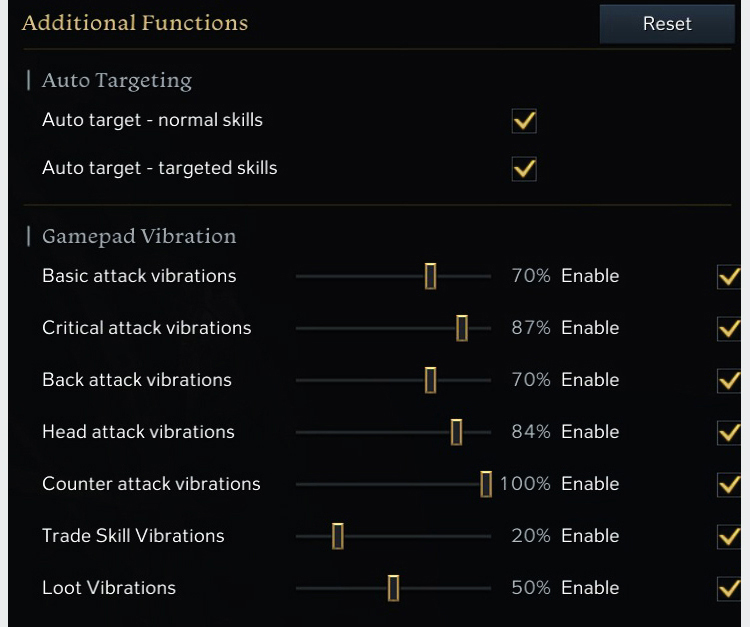
You can also customize Gamepad vibration levels for the following:
- Basic Attacks
- Critical Attacks
- Back Attacks
- Head Attacks
- Counter Attacks
- Trade Skills
- Looting
Controller Settings
Controller: Additional Function Settings
On-screen Virtual Keyboard
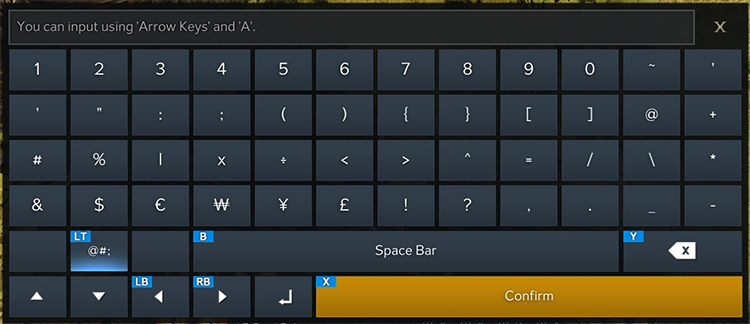
While using a Gamepad controller, you can bring up an on-screen virtual keyboard. You can use the virtual keyboard to play entirely with the controller input method and still participate in text and chat activities.
The keyboard automatically opens when you’re using a Gamepad controller and puts cursor focus into a text entry field, such as a chat window. The text entry field is exclusively for typing messages, not for inputting game commands, and can’t be remapped.
To navigate the keyboard after it’s open, use the following the controller mapping:
- B Button (B) = Space Bar
- D-pad = Keyboard Navigation
- Joystick Movement = Keyboard Navigation
- Left Bumper (LB) = Scrolls left incrementally through text
- Left Stick Click (LS) = Not Mapped
- Left Trigger (LT) = Swaps Keyboard Context
- Menu Button = Not Mapped
- Right Bumper (RB) = Scrolls right incrementally through text
- X Button (X) = Confirm text entry
- Y Button (Y) = Backspace
Note: There is currently no way to permanently dismiss the on-screen keyboard when playing with a controller, even if you also have a keyboard connected.

